We now have a door to our bathroom. It looks kind of silly because the adjacent wall is just studs - no drywall yet. So, to enter the "bathroom" you can use the door, or walk between the studs! We did learn that installing a door is a pain in the neck. Next up: soldering the copper cold and hot water supply lines for the shower. Watch out torch, here I come!
We've been gone for the past two weekends, but we've had fun despite being away from our favorite project. We spent a weekend in Gettysburg "cabining" with good friends, including the adorable, 19-month old twins! We usually go camping but considering the age of the twins (and the nasty weather we encountered), a cabin was a smarter choice.
Last weekend we were in Berkeley Springs, WV for our 7th wedding anniversary! We shopped and had a fabulous dinner at Lot 12 (highly recommend this place!) We even purchased some more art for our dining room.
Next weekend we head to Erie, PA for James's cousin's wedding.
Monday, October 13, 2008
Sunday, September 21, 2008
Yes, I know, I've been absent for the past few weeks...
Life has gotten in the way of the blog - and the bathroom renovation. We've made some success in the last few weeks - the studs for the wall are in place. We also have all the pieces to work on the shower plumbing, we just haven't done it yet. We started to install the door yesterday, but when we realized that neither one of use knew what we were doing we went to the all-knowing internet. This Old House informed us that it would take 6 to 8 hours to install the door; we had 45 minutes. Needless to say, we did nothing!
We'll be busy the next two weekends, so hopefully we'll get the door installed in 3 weeks!
This project keeps taking longer and longer...
We'll be busy the next two weekends, so hopefully we'll get the door installed in 3 weeks!
This project keeps taking longer and longer...
Sunday, September 7, 2008
Ahem...
Ahem -- "nothing" apparently includes pulling out tons of staples left from the various floor coverings that have been in that space over the years, cleaning up the mildew that was left on the surface of the existing subfloor due the leak that was the root cause of all this fun (yuck!), and putting lots of screws in the old subfloor to keep it from squeaking.
The Great Wall
Due to tropical storm Hanna, we accomplished nothing on Saturday - it was too wet to cut lumber outside! We spent last weekend in Pittsburgh for James's cousin's bridal shower, so we didn't accomplish anything last weekend.
But, alas, the weather cooperated today and we started to rebuild the wall we had to take down in order to rip up the subfloor (although after church and a trip to our favorite store, Home Depot, it was rather late!) This would seem like a simple task, but nothing in this project turns out that way. The water lines for the shower run in this wall, so we had to shut off the water and remove the valves in order to get the sole plate (the bottom 2x4) for the wall over the piping. Ain't that a beautiful sole plate!
But, alas, the weather cooperated today and we started to rebuild the wall we had to take down in order to rip up the subfloor (although after church and a trip to our favorite store, Home Depot, it was rather late!) This would seem like a simple task, but nothing in this project turns out that way. The water lines for the shower run in this wall, so we had to shut off the water and remove the valves in order to get the sole plate (the bottom 2x4) for the wall over the piping. Ain't that a beautiful sole plate!
Tuesday, August 26, 2008
Oh yeah...
...the floor now has very little deflection - so we achieved our goal by reinforcing the joists. We're still going to put an extra 1/2" of plywood underlayment down to limit it even more.
Sunday, August 24, 2008
Sunday, August 17, 2008
We Deserved a Break...
That, and we had a wedding to go to in Delaware this weekend :-) The wedding was beautiful. It was at Winterthur which was the duPont estate. The ceremony was in this little garden, the cocktail hour was at the reflecting pool, and the reception was in the visitor's center. The detail in the wedding was amazing - everything went together, from the invitation to the decorations for the reception. The bride really outdid herself. They had a 9 piece band that played everything from the oldies to Bon Jovi. We all had a fantastic time!
I did not update after last weekend, but we did finish the drain piping. We also spanned 2x4s between the joists under the edge of the existing subfloor to add strength. The next step is to put the new subfloor down and build the wall we had to demolish. We should start this early next Saturday, as we'll have to turn the water off in the house as the cold and hot water lines go through the new piece of subfloor.
I did not update after last weekend, but we did finish the drain piping. We also spanned 2x4s between the joists under the edge of the existing subfloor to add strength. The next step is to put the new subfloor down and build the wall we had to demolish. We should start this early next Saturday, as we'll have to turn the water off in the house as the cold and hot water lines go through the new piece of subfloor.
Sunday, August 10, 2008
IOC Announces New Event: Cross-Country Lumber Locating
Yep, that's right, it's a new Olympic sport. We competed in it yesterday; got the bronze. The 5/8" subfloor locating was the hardest portion of the event for us to complete. We started at the neighborhood Home Depot and purchased the gyp board we'd need. Then we drove to a real lumber yard, but it was 5 on a Saturday and they close at 2. Lowe's had it but all their pieces were damaged. We stopped at Costco for stomach refueling. The next Home Depot did not have it, but the guy recommended the lumber yard (which was closed). Then we went to another Lowe's where we finally located the required product. They also had the 1/2" underlayment we needed. We then went home to receive our medal in the event. We received high points for difficulty but lost points for execution because when our route was plotted on a map it looked like an amorphous blob. Oh well, at least we got a medal...
Sunday, August 3, 2008
The Word of the Day Is...
Aleve. What a fabulous drug! Getting out of bed this morning was amazingly hard because I didn't take my Aleve early enough yesterday. I will have to remember this as the project proceeds.
We finished reinforcing the joists as best as possible. The wonderful builder of our home didn't lay things out well, so in order to put the kitchen light fixture in the center of the room they moved one end of one of the joist, resulting in a bowed joist that didn't adhere well to the new reinforcing. Quality work, eh?
Apparently I need to back-track a bit because not all the readers of this blog are engineers, nor did they all have materials science or similar courses. That being said, the problem with our joists is that they moved downward too much when weight was applied to them. If too much of that bending (a.k.a. deflection) occurs the tiles will separate from the thin-set that adheres them to the floor or the grout or tile will crack.
We've borrowed mom's truck for the week in order to acquire all the big materials for the project, such as plywood and backer board.
Saturday, August 2, 2008
The Next Phase
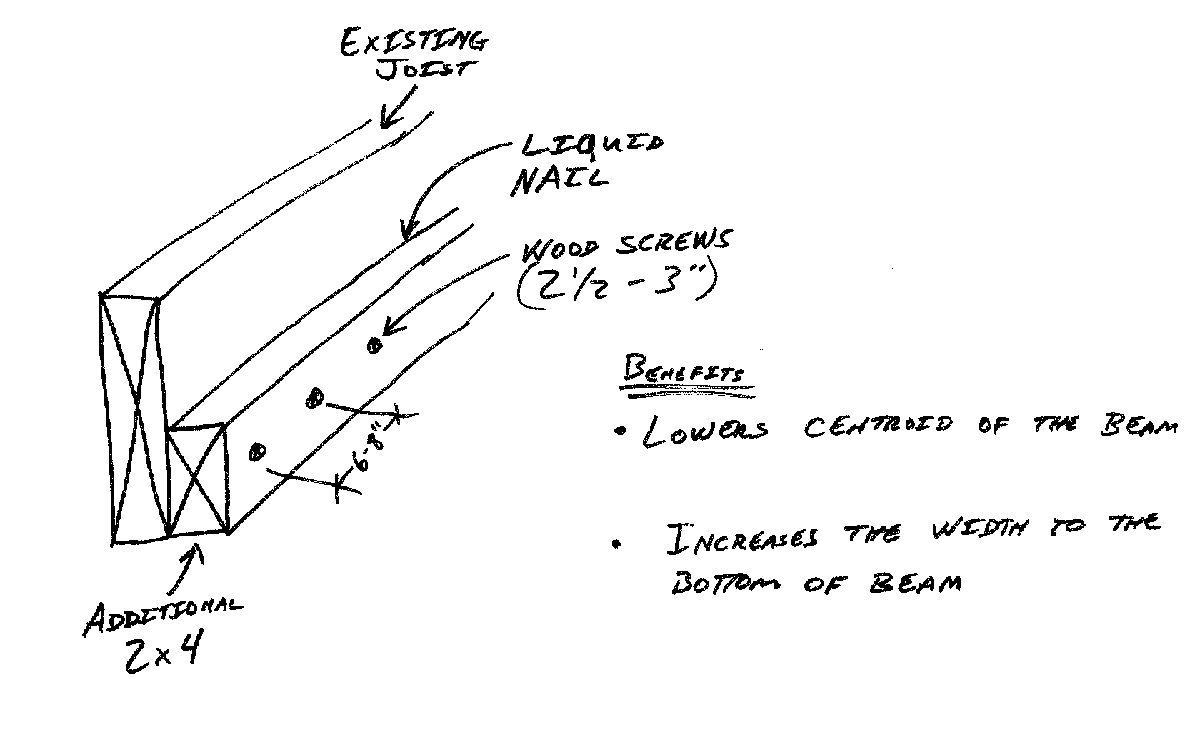
The demolition phase of our project is (hopefully) complete. It's been a busy week conferring with numerous people - here's a shout out to Dann (and his comrades at H&A) and Al! We have now executed a combination of their good ideas. See Dann' sketch below.

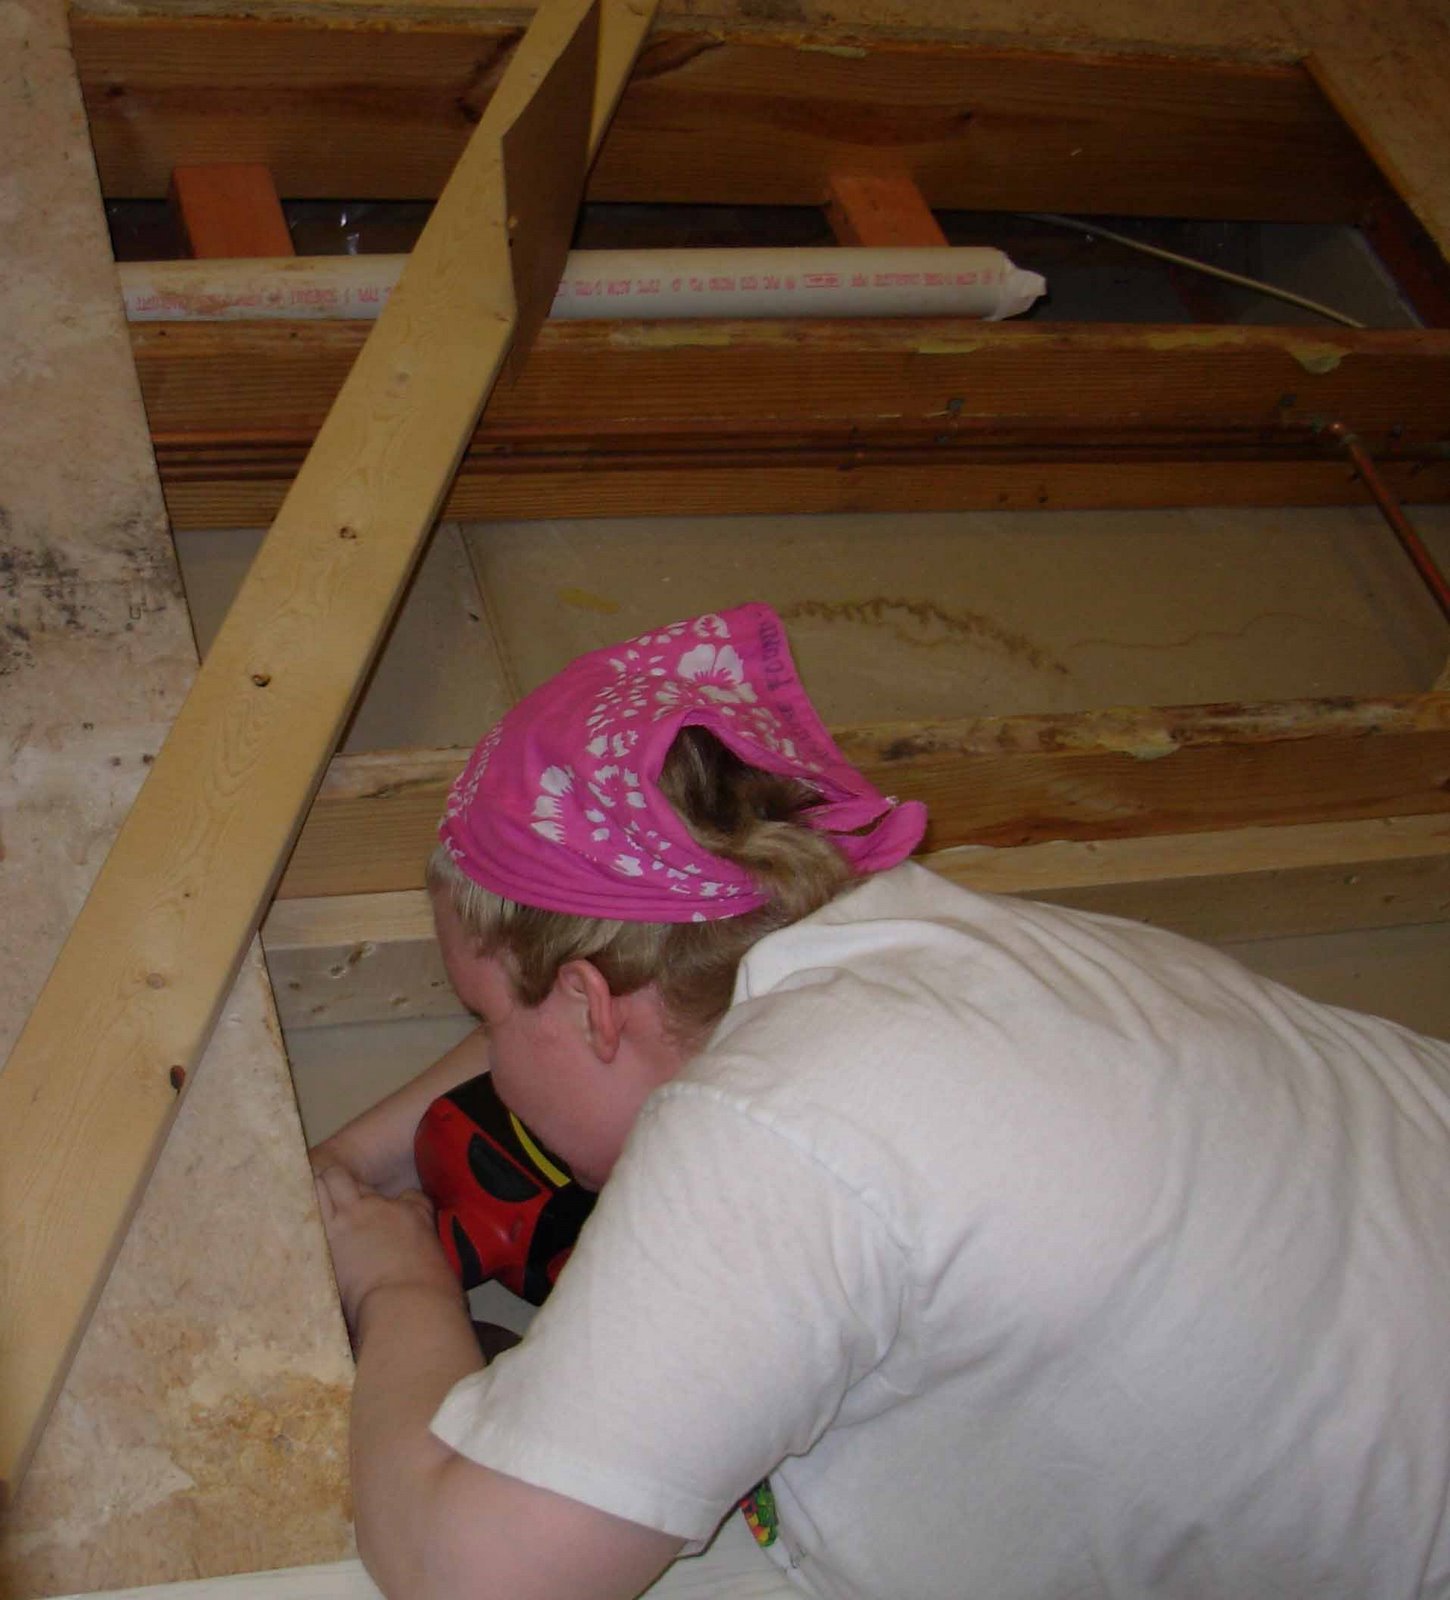
Here's the execution:

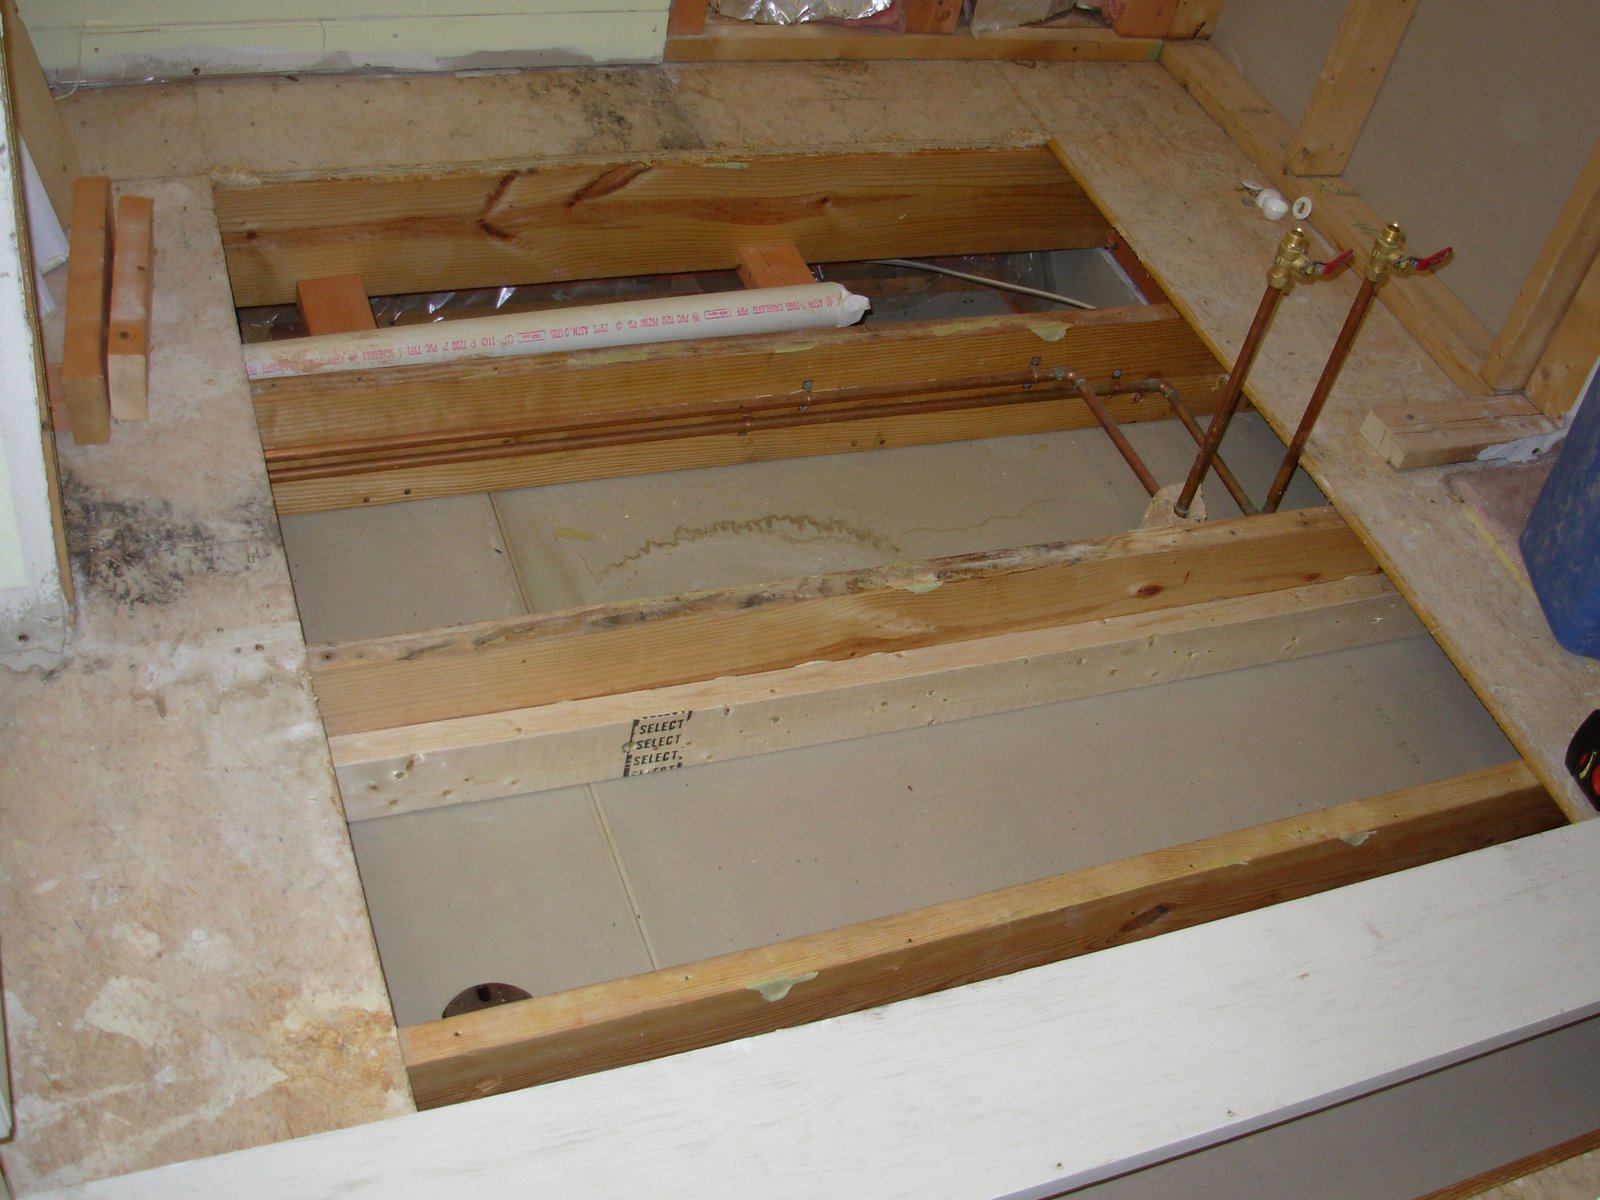
And the final outcome:

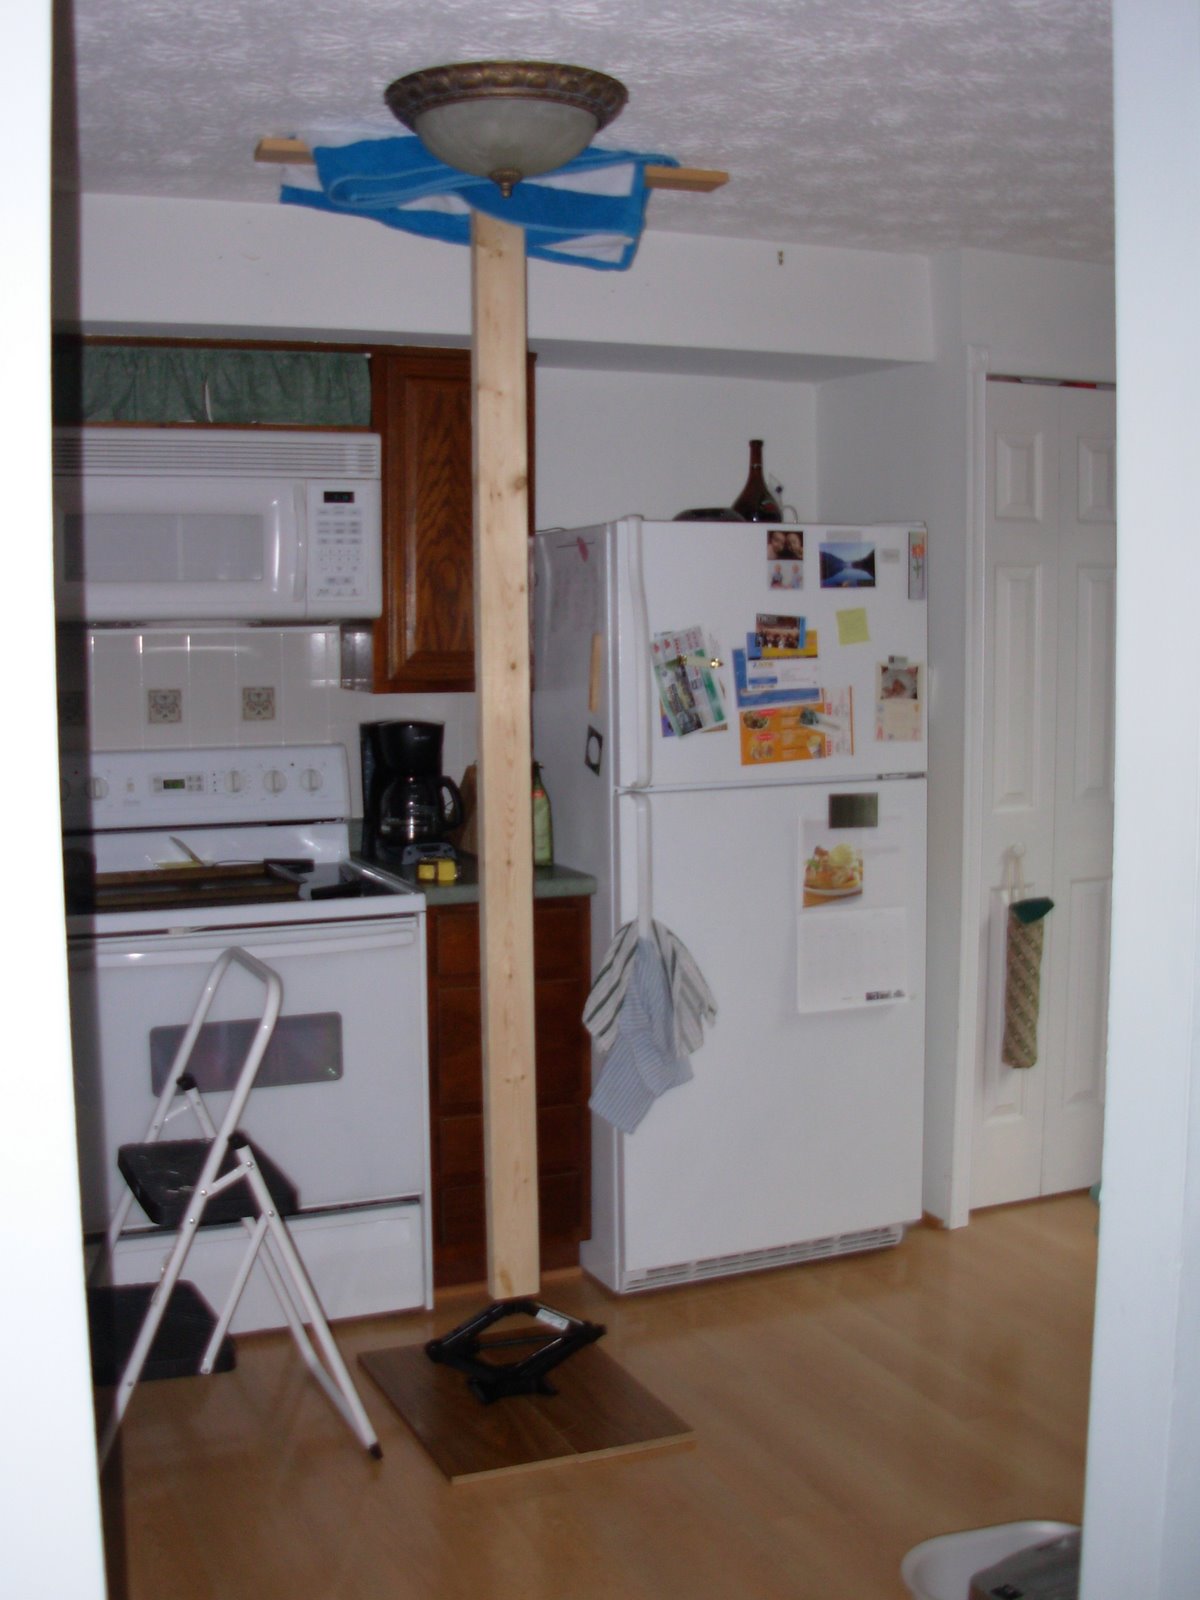
The first joist has been reinforced with a 2x4 to see if we can limit the deflection enough to lay the tile. Part of the idea was to "un-deflect" the joist before scabbing the 2x4 to the joist. So, in the kitchen (below the master bath) we have a contraption:

It's a 2x4 on James's car's jack with boards underneath to distribute the load and a 1x4 on top so we can jack up the joist to un-deflect it. There's also a towel on the 1x4 so we don't mess up our stucco ceiling.

Here's the execution:

And the final outcome:
The first joist has been reinforced with a 2x4 to see if we can limit the deflection enough to lay the tile. Part of the idea was to "un-deflect" the joist before scabbing the 2x4 to the joist. So, in the kitchen (below the master bath) we have a contraption:
It's a 2x4 on James's car's jack with boards underneath to distribute the load and a 1x4 on top so we can jack up the joist to un-deflect it. There's also a towel on the 1x4 so we don't mess up our stucco ceiling.
Sunday, July 27, 2008
Weekend 4, Sunday
Ugh. No real progress made as we discovered we had a dilemna. We had decided several weeks ago that we would put down tile flooring in lieu of the linoleum that had been there before. Today we were reading our book on bathroom remodeling and learned that our floor joists have way too much deflection to support a tile floor. The subfloor also has too much deflection. James read a lot of websites and thinks that if we add 1/2" plywood on top of our 5/8" OSB the subfloor will be okay. I will review mechanics of materials from college and see if I can come up with a way of reinforcing the joists. It seems to me that adding a steel angle along the length of the joist might just do the trick. Thoughts?? But, it now looks like we'll be ripping up more of the subfloor.
Saturday, July 26, 2008
Weekend 4, Saturday
So, I have recently entered the world of regularly reading blogs and feel that I need my own. I couldn't figure out what to blog about, until today. James and I started remodeling our bathroom a few weeks ago. Today I took a picture of him all decked out in his safety gear and decided that I would blog about our bathroom renovation.
This renovation is many years in the making. We noticed the shower had problems shortly after moving in. We removed the shower door and re-caulked the shower and then put the door back on. This did the trick for a while, but we still had water on the floor every time we showered.
We called in a few companies. One guy said all we needed was a new door - $300. The other guy said they could do the work, but wanted to remove the kitchen ceiling to address some of their concerns which is a problem because we have stucco ceiling that is difficult to duplicate. We disagreed that the ceiling needed to be replaced so we didn't hire them. Guy #2 estimate - $8,000. The last guy had us doing all these fantastic upgrades, but it still would have been a dinky master bath - $32,000. So we put off the remodel for a while.
About 8 months ago the linoleum tile in the threshold started to crack, so we stopped using the shower and planned to start the renovation in January. But, I ended up working too many weekends so we kept pushing it off. Now, we've started, but neither of us has ever done anything like this before so, there's a first time for everything!
Unfortunately it didn't occur to me to start taking pictures before we started.
Weekend 1: Cut hole in closet side of shower wall and install cold and hot water shut-off valves.
Weekend 2: Take out most of old fiberglass shower stall. The shower pan didn't want to come out.
Weekend 3: After conferring with several people we dremeled around the drain and were able to remove most of the shower pan. Determined what part of subfloor needed to be removed.
Weekend 4, Saturday: Demo wall over top of damaged subfloor. Remove subfloor using just about every tool we own (and have borrowed): Sawzall, jigsaw, hand saw, hack saw, drill, circular saw, and James's brute strength. Result: no structural damage created by us or water!
Subscribe to:
Posts (Atom)


